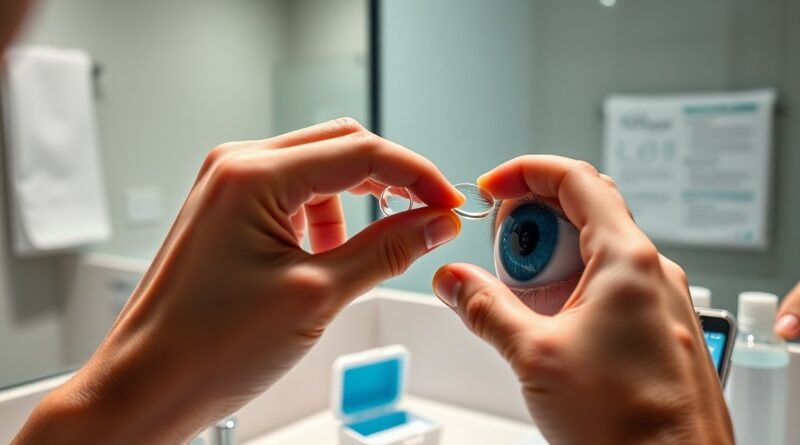
How to Insert Disposable Contact Lenses for the First Time Without Panic
Guide yourself through the process with this step-by-step beginner’s tutorial designed to walk new contact lens wearers through the entire insertion process. Always wash your hands thoroughly before handling lenses to prevent infection. Never insert a lens that feels dry or damaged-it can scratch your eye. Hold your eyelids open steadily and place the lens directly on your iris. Stay calm and breathe; most first-time users adapt within minutes.
Key Takeaways:
- Wash your hands thoroughly with soap and dry them using a lint-free towel before handling lenses-any dirt or residue can cause irritation or make insertion harder.
- Check the lens orientation by placing it on your fingertip; it should form a smooth, bowl-like shape-if the edges flare outward, it’s inside out and needs to be flipped.
- Stay calm and blink slowly; tensing up or rushing increases the chance of blinking at the wrong moment-use your free hand to gently hold your eyelids open and look straight ahead as you place the lens.
Hygiene Factors for Safe Handling
Washing your hands thoroughly prevents harmful bacteria from transferring to your eyes or lenses. Always use soap and water, scrubbing for at least 20 seconds. Rinse well and avoid scented or moisturizing soaps that can leave residues. After
Selecting the correct soap
Choose a fragrance-free, lotion-free soap to prevent residue on your fingers. Harsh chemicals or added moisturizers can transfer to lenses and irritate your eyes. After
Drying hands with lint-free towels
Use a clean, lint-free towel to avoid fibers sticking to the lens. Regular towels can shed lint that may enter your eye or contaminate the lens surface. After
Cotton or microfiber towels labeled as lint-free are ideal because they minimize debris. Drying your hands completely also improves grip when handling the delicate lens. Even small water droplets can carry contaminants, so thorough drying is important for safe insertion. After
How to Determine Correct Lens Orientation
Checking your lens orientation before insertion prevents discomfort and potential eye irritation. A properly oriented lens forms a smooth, bowl-like curve-if the edges flare outward, it’s inside out. Always verify the shape using simple tests like the side-profile inspection or the taco test. For more guidance, see First-Time Contact Lens Wearer? How to Insert and Remove … to ensure a safe start.
The side-profile inspection
Hold the lens on your fingertip and look at it from the side. A correctly positioned lens resembles a bowl with even, upward-curving edges. If the rim bends outward like a taco shell, it’s inside out and must be flipped. This quick visual check takes seconds but prevents painful misplacement.
Performing the taco test
Gently squeeze the edges of the lens together like you’re making a taco. If the edges point outward instead of meeting smoothly in the center, the lens is inside out. Properly oriented lenses will form a clean “U” shape without flaring. This simple tactile method confirms orientation when lighting makes visuals hard.
When performing the taco test, use clean fingers and a steady hand. The lens should spring back gently when released if it’s in the correct orientation. Never force a lens onto your eye if it feels off-recheck using this method. Many first-time users avoid irritation by making this test a routine step before every insertion.
Calming Tips for Nervous First-Timers
Inserting your first disposable contact lens can feel intimidating, but staying calm makes it easier. Focus on slow movements, clean hands, and a quiet space. You’re not alone-most beginners feel nervous at first. Trust your preparation, and Thou.
Creating a stress-free environment
A quiet, well-lit room with a clean mirror helps you stay focused. Remove distractions like loud music or crowded spaces. Wash your hands thoroughly and keep your lens case and solution nearby. A clutter-free surface reduces the chance of dropping or contaminating the lens.
Controlled breathing exercises
Take slow, deep breaths: inhale for four counts, hold for four, exhale for six. This simple pattern lowers your heart rate and reduces the urge to blink rapidly. Controlled breathing calms your nerves just before touching your eye.
Breathing techniques work because they activate your parasympathetic nervous system, which counteracts anxiety. When you’re tense, your muscles tighten-including those around your eyes-making insertion harder. By practicing four-count inhales and six-count exhales, you signal your body to relax, increasing your control and comfort during the process.
How-To Overcome the Blink Reflex
Keeping your eye open while inserting a contact lens becomes easier with the right technique. Use your non-dominant hand to gently hold your eyelids apart, focusing on steady control rather than force. Resist the urge to squeeze your eyes shut by maintaining light, consistent pressure on the skin around the eye socket.
Stabilizing the upper eyelid
Use your middle finger to gently lift and hold your upper eyelid in place. Anchor it against your brow bone to prevent involuntary blinking. This maneuver gives you a clear, stable opening and reduces the natural reflex to close your eye during lens placement.
Proper placement of the lower lid
Hook your ring finger under your lower eyelid to pull it downward slightly. This exposes more of the sclera and creates a smooth surface for the lens to glide onto. Keep steady tension to minimize movement and avoid disrupting the lens as you release it.
Positioning your lower lid correctly ensures optimal lens alignment and comfort. By using your ring finger to retract the lid just enough-without stretching or pulling too hard-you maintain control while reducing irritation. Proper lower lid placement prevents the lens from catching on the edge of the eyelid or folding, which can cause discomfort or improper seating on the cornea.
Factors to Address When a Lens Won’t Go In
If your contact lens resists settling on your eye, stay calm and assess the situation. Re-wet the lens with saline solution before reattempting insertion. Check for microscopic debris or tears that may interfere with comfort. Ensure your fingers are clean and dry. Thou can always refer to the New Contact Lens Wearer Guide for visual demonstrations and expert tips.
Re-wetting the lens surface
Moisten the lens with sterile saline solution if it feels dry or sticks to your finger. A wet surface slides easily onto the eye and improves initial adhesion. Do not use tap water or saliva. Thou will notice smoother placement when the lens is properly lubricated.
Checking for microscopic debris
Hold the lens up to a bright light and inspect for tiny particles invisible to the naked eye. Even microscopic debris can cause discomfort or prevent proper fit. Rinse the lens gently with solution. Thou protect your eye health by ensuring cleanliness before every insertion.
Microscopic debris such as dust, skin cells, or residual cleaning agents can cling to the lens surface despite careful handling. These particles, though unseen, may disrupt the lens’s ability to adhere smoothly to your eye, leading to irritation or a sensation of movement. CooperVision recommends rinsing lenses with multipurpose solution immediately before insertion to reduce this risk. Thou minimize complications by treating every lens with meticulous care.
Tips for Avoiding Common Rookie Mistakes
Many first-time wearers touch their lenses with dirty hands, skip rinsing solutions, or mix up left and right. Avoid these errors by always washing with soap and water, labeling storage cases clearly, and never using tap water. The proper routine prevents irritation and keeps your eyes healthy.
Preventing lens damage
Always handle your disposable contact lenses gently using clean fingertips-never nails. Store them in fresh solution daily and replace the case every three months. The right care extends lens life and protects your vision.
Managing lens contamination risks
Tap water carries Acanthamoeba, a rare but serious eye infection risk. Never rinse lenses or cases with it. Use only FDA-approved contact lens solution and close the case tightly. The smallest shortcut can lead to severe discomfort or infection.
Exposure to water is one of the top causes of microbial keratitis among new contact wearers. The Acanthamoeba parasite, found in tap water, swimming pools, and showers, can adhere to lenses and invade the cornea. Always remove lenses before showering or swimming, and never top off old solution-discard it daily. The simplest habits reduce your risk of long-term damage.
Final Words
From above, you now know the exact steps to insert disposable contact lenses calmly and correctly. Wash your hands, inspect the lens for tears, and use the recommended solution. Keep your eyes steady, apply the lens gently, and blink slowly to settle it. This simple routine, practiced daily, builds confidence and ensures clear, comfortable vision from day one.
FAQ
Q: How do I prepare my hands and lenses before inserting contacts for the first time?
A: Wash your hands thoroughly with unscented soap and dry them using a lint-free towel. Avoid moisturizing soaps or lotions, as they can stick to the lens. Open the contact lens case carefully, making sure the lens is in the correct solution. Use your fingertips-never your nails-to handle the lens. Place it on your index finger, ensuring it’s not damaged or inside out before insertion.
Q: How can I tell if my contact lens is inside out?
A: Hold the lens on your fingertip and look at it from the side. It should form a smooth, bowl-like shape, curving upward like a taco. If the edges flare outward like a saucer or the rim looks thick and uneven, it’s inside out. Some lenses have laser markings-check your brand’s instructions to see if numbers or letters should face up. When in doubt, flip it and try again.
Q: I keep blinking when I try to put the lens in-how do I stop flinching?
A: It’s normal to blink when something approaches your eye. To reduce the reflex, rest your elbow on a table to steady your hand and keep your head still. Use your free hand to gently pull your upper eyelid up and your other hand to hold your lower lid down. Focus on a spot behind the mirror, not your finger. Practice opening your eyes wide in front of a mirror first, without the lens, to build confidence.
Q: What should I do if the lens won’t go in or keeps sliding off?
A: Make sure your eye is fully open and your lids are held taut. If the lens sticks to your finger, lightly touch it with a clean fingertip to release it, or try using a drop of saline solution on the lens to help it slide. If it keeps moving off-center, remove it, rinse it with solution, and reposition. Don’t force it-take a breath, reset, and try again. Sometimes blinking too soon causes it to shift, so keep your eye open for a few seconds after placement.
Q: I’m nervous about touching my eye-how can I stay calm during my first try?
A: Start by practicing near the mirror without the lens. Touch your eyebrow and cheekbone to get used to being close to your eye. Take slow breaths and remind yourself that millions of people do this daily without issue. Insert lenses at a time when you’re relaxed, not rushed. If one eye feels too hard, try the other first-it might feel easier. If the lens feels uncomfortable or painful, remove it, rinse it, and try again. Discomfort usually means it’s not seated right, not that something is wrong with your eye.
